Affiliate Disclosure: We may be compensated if you use our links to make a purchase. We are extremely selective in who we partner with & only recommend products we believe in. Our affiliate relationships do not influence our recommendations.
Do you want to redirect your users to a specific page when they login to your LearnDash site? There are several ways to set up the LearnDash login process, and they all have different approaches to where they send users after they login. This article will explain 2 methods for controlling the LearnDash login redirect process. We’ll show you how to send users to specific pages after they login (and logout) of your LearnDash site.
Subscribe to our YouTube channel for more LearnDash tutorials.
Here’s the video version covering both options that are discussed below:
The Default Login Process
I want to briefly cover what the default login process looks like. It varies depending on what login method you’re using. Let’s look at two of the most popular ways to login.
Using the Default WordPress Login Page (wp-login.php)
WordPress has its own default login process, and it is NOT optimized for a LearnDash site. Many people choose to use a login customization plugin. There are many available. Not always, but often times, these plugins utilize the default WordPress login page (wp-login.php), and provide a way for you to customize the way it looks with a unique design.
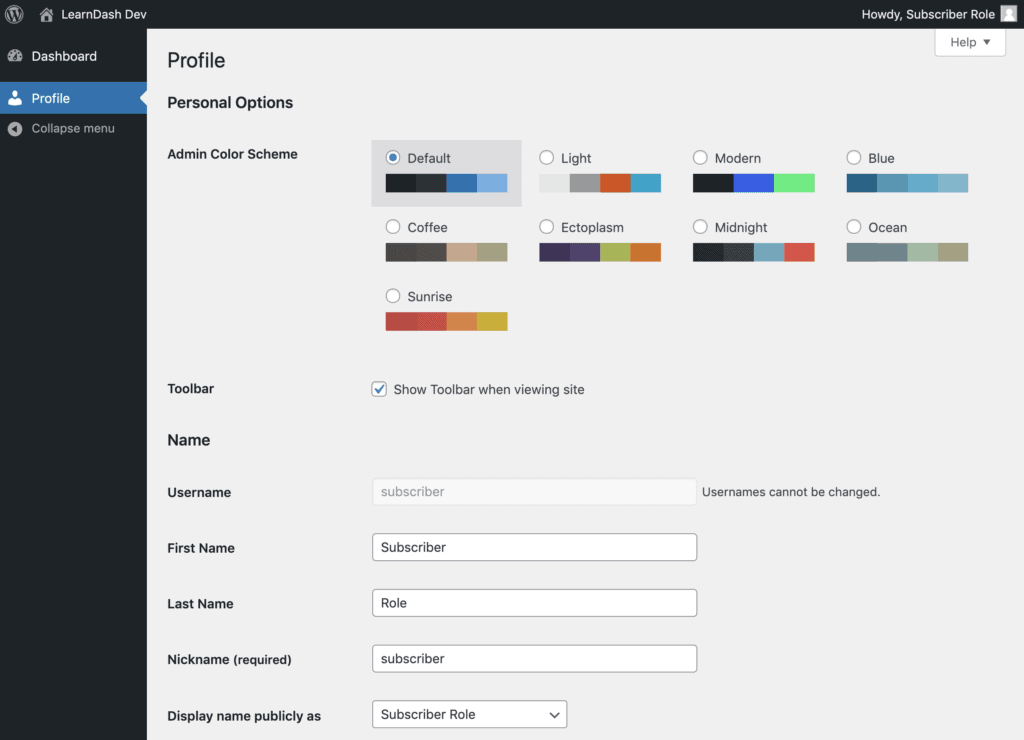
When using this method, users will be redirected to the backend of WordPress, to a profile page (yoursite.com/wp-admin/profile.php). This page looks nothing like your site and provides a poor user experience.

There is also no default logout option included with WordPress.
Using the LearnDash Login Popup
The other common way to login to a LearnDash site is to use the LearnDash login popup. First, you need to enable this in LearnDash LMS > Settings > General. Then you can trigger the popup in a few different ways (clicking a login button on a course page, adding a login link in your menu, etc.).

With this method, the login redirect will keep you on the same page you were on when you triggered the popup. If you’re on the homepage and you click a link that opens the login popup, then you login, you are redirected right back to the homepage.
The same thing happens when you click a logout link—you stay on the page you were already on.
While remaining on the same page isn’t the worst experience, it can certainly be improved. Let’s talk about how to set up custom LearnDash login redirects so you can provide a better experience for your users.
We’ll cover 2 options in this article:
- Uncanny Toolkit for LearnDash: easiest method, limited flexibility
- LoginWP plugin: slightly more involved but still easy, way more flexibility
Both plugins have pro versions, but only the free version of each is required.
WARNING
Only use one of these options. You should never have more than one plugin on your site that deals with redirections, as this can cause conflicts.
1. Uncanny Toolkit for LearnDash: Login/Logout Redirect
Subscribe to our YouTube channel for more LearnDash tutorials.
If you want the quickest, easiest solution to set up a single login redirect (and a single logout redirect) for all users of your site, this is the solution to use. Especially if you’re already using Uncanny Toolkit for LearnDash on your site.
- Install & activate the Uncanny Toolkit for LearnDash plugin (free version)
- Navigate to Uncanny Toolkit > Modules
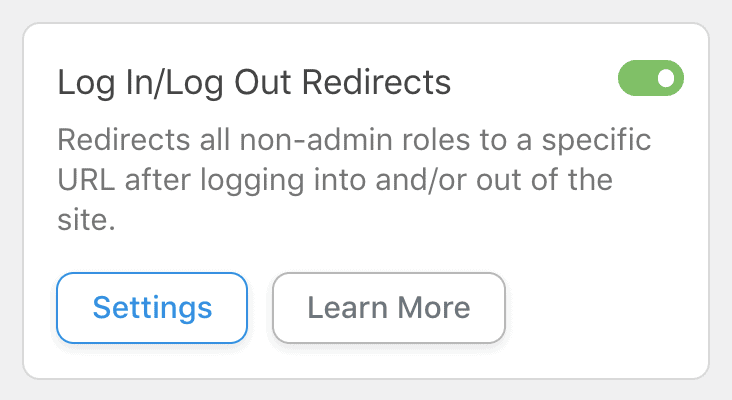
- Click the toggle to enable the Log In/Log Out Redirects module
- Click the Settings button
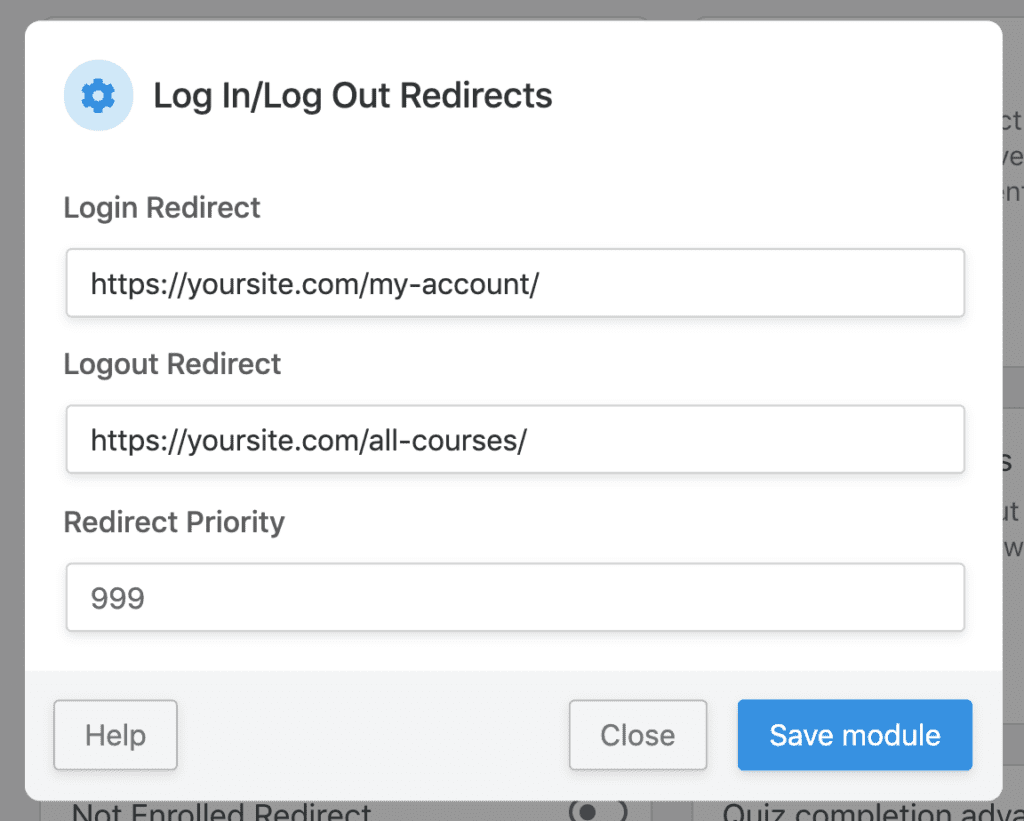
- Enter your login & logout URLs (you can enter one and leave the other blank, or enter both)
- Leave the Redirect Priority at its default setting
- Click the Save module button


That’s all there is to it. Your redirects should now be working.
While not yet tested, this should also work just fine if you’re using the Uncanny Toolkit Login Form.
Here’s the official documentation for this module →
2. LoginWP Plugin
This option is not quite as simple, but still very easy to set up. However, it’s much more flexible. It allows you to set up login & logout redirects for different user roles (admin, group leader, subscriber, etc.), as well as individual users.
I would recommend this option in the following scenarios:
- If you’re using the Uncanny Groups plugin and have a group management page
- If you’re using the Tin Canny Reporting plugin and have Group Leaders or other users who need quick access to this reporting dashboard
- If you’re using the Instructor Role plugin by WisdmLabs
- If you’re an admin who logs in from the frontend of your website and you always want to be sent to the WordPress admin area
LoginWP allows you to set up multiple login redirects depending on the type of user who is logging in.
- Install & activate the LoginWP plugin (free version)
- Navigate to LoginWP > Redirections
- Click the Add New button
- Select a condition… choose User Role
- Choose the user role you want to set up a redirect for
- Enter the Login URL and Logout URL for that role
- Click the Save Rule button
Repeat the steps for each user role you want to set up login redirects for.
For individual users, you would choose Username as the condition, and then select the username from the corresponding dropdown menu.

/wp-admin/ area.
LoginWP Pro
There is a premium version of LoginWP, and it includes a few more options for customizing LearnDash redirects. It also integrates with the following plugins, offering some unique redirect options.
- LearnDash: Enrolled course, user group
- MemberPress: Subscribed membership
- WooCommerce: Product, product category purchased from
- WooCommerce Subscriptions: Active user subscription
- WooCommerce Memberships: Active membership plan
- Theme My Login, Paid Memberships Pro, Gravity Forms, WPForms, and many more.
If you have advanced login redirection needs, it might be worth taking a look at the pro version.
Subscribe to our YouTube channel for more LearnDash tutorials.
There are other types of login forms that can be used, and other methods of login & logout redirects for LearnDash, but these are two of the most common scenarios/tools to get the job done.
Leave a Reply